
Water Bottle Holder with Cellphone Pocket
When you go on a short adventure – a hike, local trip to the park, or the beach you need hydration and the all-important cell phone. This DIY water bottle holder can be slung over the shoulder and with place for two water bottles is all you need to adventure without a bulky tote or backpack. It’s quick to make, sturdy and the quilting protects the contents.
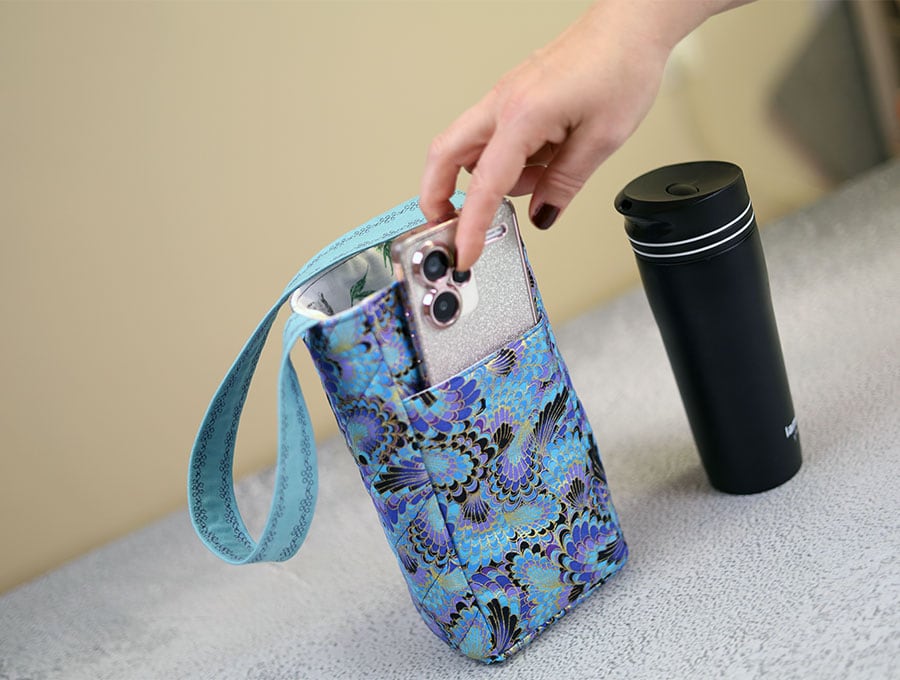
When you need to have only the essentials – water and a cell phone, this is the handy carrier to keep them insulated with the quilting for protection – especially the cell phone. Sling it over your shoulder and take off on a neighbourhood bike ride, add to your beach bag, or take it with you when you go camping, so you always stay hydrated and in contact.

Below you will find my step by step written tutorial how to mkae this handy water bottle holder with cellphone pocket with VIDEO instructions for all the visual learners.
We occasionally link to goods offered by vendors to help the reader find relevant products. Some of the links may be affiliate meaning we earn a small commission if an item is purchased.
Table of Contents
- 1 How to make a water bottle holder
- 2 Supplies and tools
- 3 How to Sew a water bottle holder
- 3.1 Water bottle holder VIDEO TUTORIAL
- 3.2 INSTRUCTIONS:
- 3.3 INSTRUCTIONS:
- 3.4 STEP 1:
- 3.5 STEP 2:
- 3.6 STEP 3:
- 3.7 STEP 4:
- 3.8 STEP 5:
- 3.9 STEP 6:
- 3.10 STEP 7:
- 3.11 STEP 8:
- 3.12 STEP 9:
- 3.13 STEP 10:
- 3.14 STEP 11:
- 3.15 STEP 12:
- 3.16 STEP 13:
- 3.17 STEP 14:
- 3.18 STEP 15:
- 3.19 STEP 16:
- 3.20 STEP 17:
- 3.21 STEP 18:
- 3.22 STEP 19:
- 3.23 STEP 20:
- 3.24 STEP 21:
- 3.25 STEP 22:
- 3.26 STEP 23:
- 3.27 STEP 24:
- 3.28 STEP 25:
- 4
How to make a water bottle holder

Supplies and tools
- fabric – 2 pieces of 100% tightly woven cotton (one main, one lining)
- fusible batting
- matching thread
- scissors (or rotary cutter and a cutting mat)
- ruler or measuring tape
- iron and ironing board
- sewing clips or pins
DOWNLOAD: water bottle holder with cellphone pocket [Free pdf file]
Follow us for free patterns & tutorials! [easy-profiles]
How to Sew a water bottle holder
Watch the diy water bottle holder with pocket video first and then follow the written step by step instructions below.
Please enjoy and don’t forget to Like and SUBSCRIBE over on YouTube to be kept up to date with new videos as they come out.
Water bottle holder VIDEO TUTORIAL
INSTRUCTIONS:
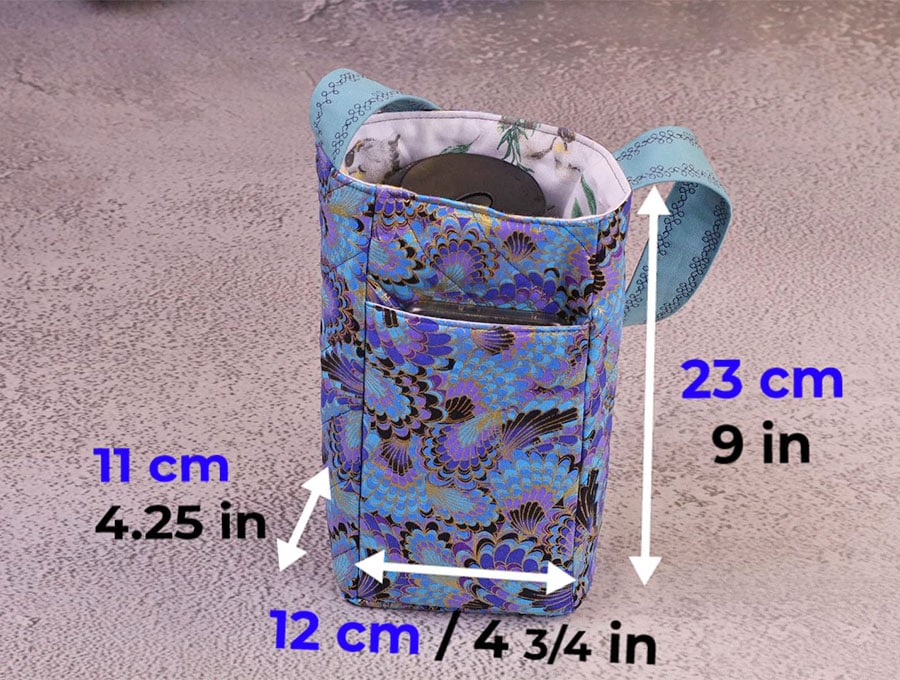
Finished size (L x W x H): 12 cm x 11 cm x 23cm or 4 3/4″ x 4 1/4″ x 9″
Fabric measurements:

FRONT:
- 29 x 24.5 cm (11 1/4″x 9.5″) from the main fabric
- 29 x 24.5 cm (11 1/4″x 9.5″) from lining
- 27 x 22.5 cm (10 3/4″x 9″) from fusible batting
BACK:
- 12 x 24.5 (4 3/4″x 9.5″) from the main fabric
- 12 x 24.5 (4 3/4″x 9.5″) from lining
- 10 x 22.5 cm (4″x 9″) from fusible batting
BOTTOM:
- 14 x 12 cm (5 1/4″x 4 3/4″) from main fabric
- 14 x 12 cm (5 1/4″x 4 3/4″) from lining
- 12 x 10 cm (4 3/4″x 4″) from fusible batting
POCKET:
- 12 x 18.5 cm (4.5″x 7 1/4″) from main fabric
- 12 x 18.5 cm (4.5″x 7 1/4″) from lining
- 10 x 16.5 cm (4″x 6.5″) from fusible batting

from handle fabric cut:
1 strip – 10 x 40cm (4 x 16″)
OR use 40 cm /16″ long webbing that is 2.5cm (1 inch) wide
If making your own bottom pattern you will also need:
1 x piece of paper 14 x 12 cm (5 1/4 x 4 3/4 inches) to cut the pattern
INSTRUCTIONS:
STEP 1:
Download and trim the water bottle holder template. Cut batting according to the dashed line and fabric according to the straight line. Cut the other fabrics according to the measurements given. Proceed with Step 2.
— OR —-
You can make your own template for the bottom by cutting a piece of card 5 ¼ x 4 ¾ inches (14 x 12 cm), then fold in half on the 5 ¼ inch (14 cm side). To make the template of the bottom:
- Using a ruler and pen or pencil make a mark 3/8 of an inch (1 cm) in from the top right hand corner. This will be on the side opposite the fold.
- mark 1 ¼ inches ( 3 cm) down from the top.
- Do the same marking 1 ¼ inches ( 3 cm) up from the bottom right corner and 3/8 of an inch (1 cm) in from the bottom.
- You are now going to create a curve using the points so the back of the base has a curve to accommodate the two water bottles and the front is flat for the cell phone pocket. So, draw a curve from the bottom fold point to the 4 points marked ending at the top 3/8 of an inch (1 cm) mark.
- Measure the curve – it should be 10 5/8 inches (27 cm). If it’s less expand the curve a little, if more flatten your curve slightly. When satisfied with the length of the curve, clip off the extra card.
STEP 2:
Place the template over the fusible batting piece for the bottom, lining up the flat side with one of the long sides, then trace around it with a fabric marking pen.
STEP 3:
Cut out the shape using a rotary cutter and self-healing cutting mat or scissors.
STEP 4:

Place the bottom outer and lining fabrics face to face on your worktop or mat, place the interfacing on top then mark 3/8 of an inch larger than the fusible batting piece all around, including the flat side. We cut the batting smaller to reduce bulk when doing the seams.
STEP 5:

Fuse the applicable batting pieces to the wrong side of the outer pocket piece, the outer front piece, and the outer back piece.
STEP 6:

Quilt the front piece working diagonally from top left corner to bottom right corner, using 2 pieces of washi tape as a guide and moving them across as you finish each line.

Next quilt the back piece and the bottom in the same way. Do not quilt the pocket piece.

STEP 7:
Take the outer pocket piece with batting fused to it and place right side to right side over the lining piece. Clip in place.
STEP 8:

Stitch along one short side of the pocket 3/8 of an inch (1 cm) from the edge.
STEP 9:

Open out the pocket piece and fold and finger press the seam, so the right sides are on the outside, then top stitch across where you made the seam 1/8 of an inch (3 mm) from the edge.
STEP 10:
Place the front piece of outer fabric right side up on your worktop and over it place the pocket piece outer side up. Line up the bases and sides and clip in place.
STEP 11:

Stitch, using a ¼ inch (6 mm) seam allowance along the sides and base of the pocket, backtacking where you start and finish on each side.
STEP 12:

Clip the sides of the front piece to the sides of the back piece. The back piece is larger to accommodate the shape of the two water bottles.

Stitch down the sides using a 3/8 inch (1 cm) seam allowance.
STEP 13:

Repeat the previous step with the front and back piece of the lining.
STEP 14:

Make small cuts in the curved part of the base, making sure it does not go all the way to the fused batting. On the back of the column you stitched for the water bottle body make small cuts. This is to ease the fabric around the curve when you stitch.
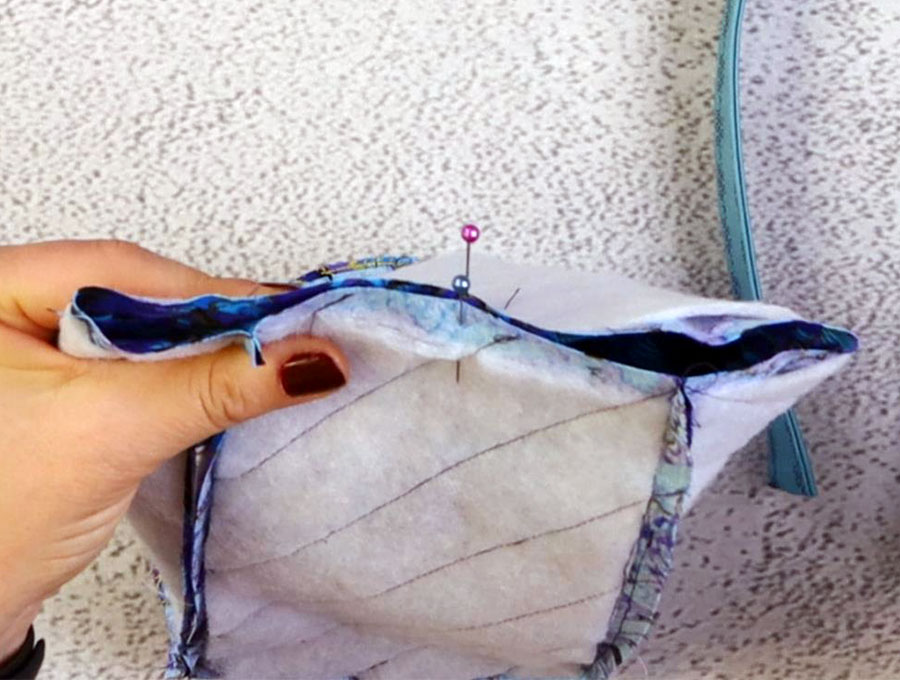
STEP 15:

With the column inside out, clip or pin the straight part of the base to the straight part of the front, then ease the curved area into the back part and clip.
Stitch around the base 3/8 of an inch (1cm) from the edge.
STEP 16:

Repeat the previous 2 steps for the lining base and column.

STEP 17:
For the handle fold along the length with the right sides outside and press, then open up and fold each raw edge to the center fold and press. Fold once more along the length so no raw edges are visible and press.
STEP 18:

Clip along the length then stitch as close to the edge as possible down each of the long sides. I used a fancy stitch on the video but you can use a straight stitch.

NOTE: If you are using webbing instead of a fabric handle you can omit steps 23 and 24 and proceed straight from Step 16 to Step 19.
STEP 19:
For correct placement of the strap take the outer fabric with batting attached, fold to find the middle of the front piece and mark with a pin. Fold to find the middle of the back piece and mark with a pin, then line up the two pins to find the middle of the sides and mark each side with a pin.
STEP 20:
With the right side of the handle fabric facing the right side of the water bottle fabric ( which is still on the inside of the column) pin, ensuring the middle of the handle end lines up with the pin marking the middle of the side pin.
STEP 21:

Stitch across the handle ends ¼ inch (6 mm) from the raw edges to secure them, backtacking across the width of the handle.
STEP 22:

Turn the lining column the right way out and slip it inside the outer fabric, aligning the seams. The right sides will be facing each other. Pin along the top.
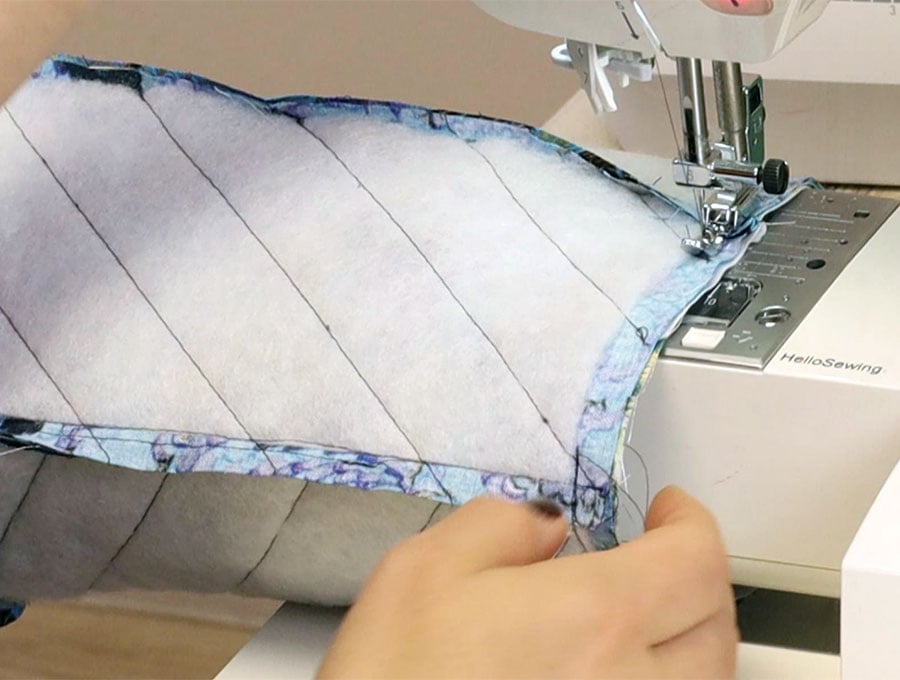
STEP 23:

Stitch along the curved part of the top 3/8 of an inch (1 cm) from the raw edges, leaving the straight part above the outer pocket open.
STEP 24:

Fold down the seam allowance of the gap in line with the stitching and finger press, then turn the lining and the outer the right way out, slipping the lining into the outer and aligning the edges neatly before pressing the top.
STEP 25:

Clip the top and top stitch 1/8 of an inch (3 mm) from the edge all around, including over the gap.
Make sure to remove the free arm from the machine for easy sewing around the top.

Your water bottle is now ready to use – it will take two small water bottles or one larger one – depending on whether you are adventuring solo or with a friend, or you simply drink a lot of water! There is place for the all-important cell phone too. If you feel you would rather have a closure on the cell phone pocket you can always stitch a button on the outside of the pocket. Then above it on the main body stitch a small tab to loop over and keep the phone safe.

Did you like this tutorial? Let us know with a like and hit that subscribe button to keep the tutorials rolling in. At Hello Sewing we specialize in projects that use smaller pieces of fabric and that are practical. If you made the water bottle holder then share a photo of it in use on an adventure – mountains, beach, meadows, parks – we’d love to see it in action. You can post photos in the comments section.
Do you like this? Pin for later:
Wanna be friends? Click HERE and follow me on Pinterest
RELATED: